Skip to Main Content

Tech Tools: Using Microsoft Word

How to use different tools for assignments writing and presentations

Microsoft Word

MS Word is a word processing programme developed by Microsoft and is part of the Office 365 suite.  It is used to create, edit and format documents. Word has many features. The key ones that are useful to you as a student are:

  • Templates you can use for different types of documents
  • A spell and grammar check tool. This helps you find and fix any mistakes in your document
  • Formatting options where you can change your font, font size, colour, design, layout and margins, apply page breaks, etc.
  • The ability to add highlighting, line spacing, bullet points or numbered lists, images, tables, charts
  • The ability to alphabetically sort and apply hanging indentation (See the Formatting your reference list tab)    
  • The ability to insert text boxes, symbols (i.e. macrons used in Māori), embed links, search and replace words
  • The ability to collaborate where you can share your document with others and add comments 

On this page

Adding and formatting text                                            Dictating your documents in Word                    Referencing feature in Word          

Adding pictures, shapes, charts and more                    Embedding a link                                               Removing the squiggles

Collaborating or commenting on a Word document      Getting started with Word                                  Saving your Word document

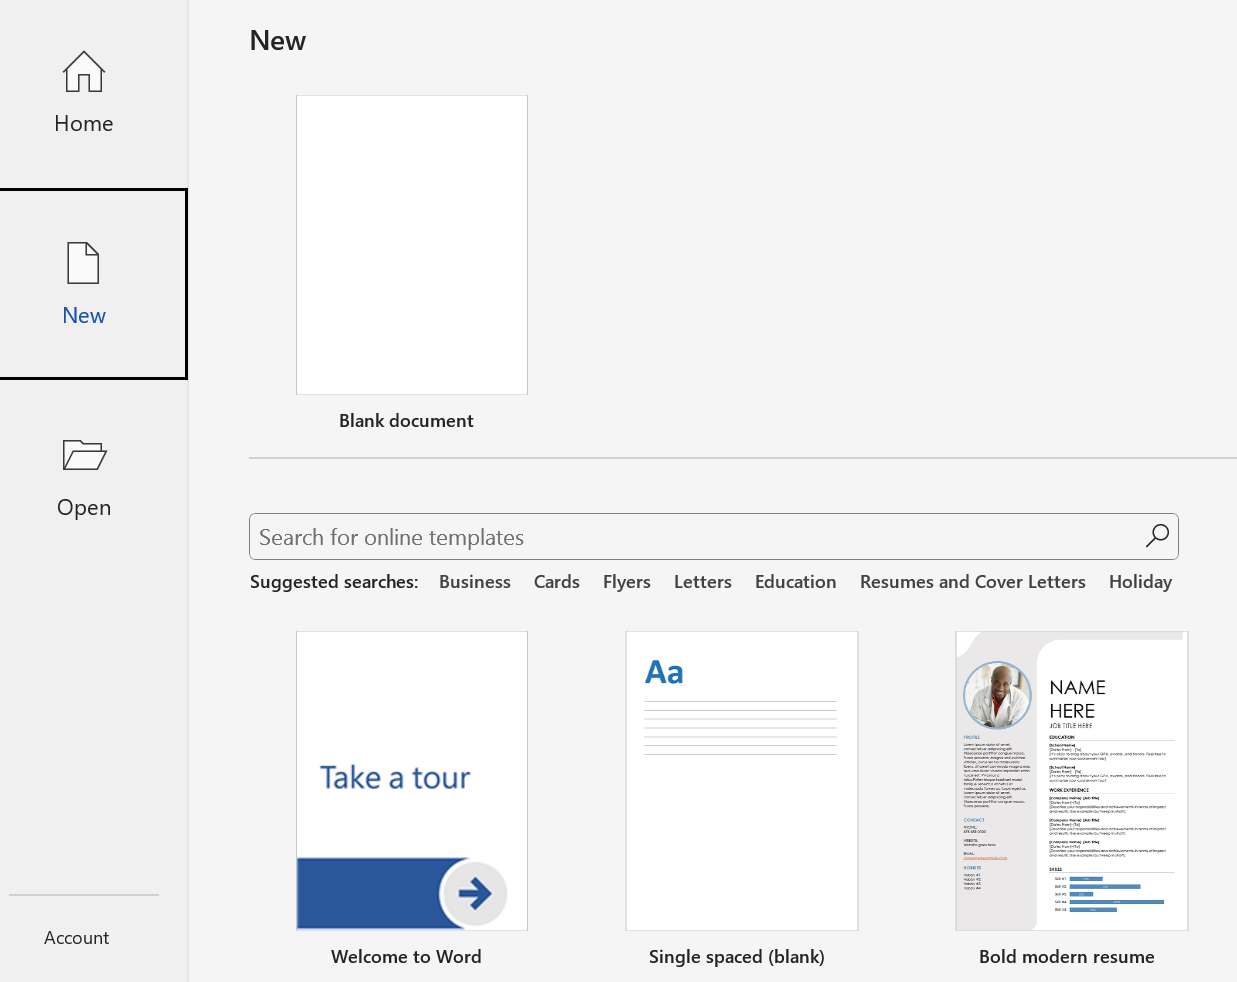
Creating a document in Word                                        Inserting a table                                                 Sharing your Word document         


Getting started with Word

  • If you are using the desktop version, click the Microsoft tab on the bottom left of the page 
  • If you are using the online version of Microsoft 365, click the app launcher (Dots in a square) and select Word

Adding and formatting text

Add text

  • Place the cursor where you want to add the text.
  • Start typing

Replace text

  • Select the text you want to replace (To select a single word, double-click it., to select a line, click to the left and highlight the line)

  • Start typing.

Format text

  • Select the text you want to format.
  • From the pop-up toolbar or the Home tab, select an option to change the Font, Font Size, Font Color, or make the text bold, italics, or underline.

Copy formatting

  • Select the text with the formatting you want to copy

  • Click  Excel Format Painter icon  Format painter, and then select the text you want to copy the formatting to.

  • Tip: Double-click Excel Format Painter icon  Format painter if you want to copy the formatting in more than one place.


Word shortcut keys 

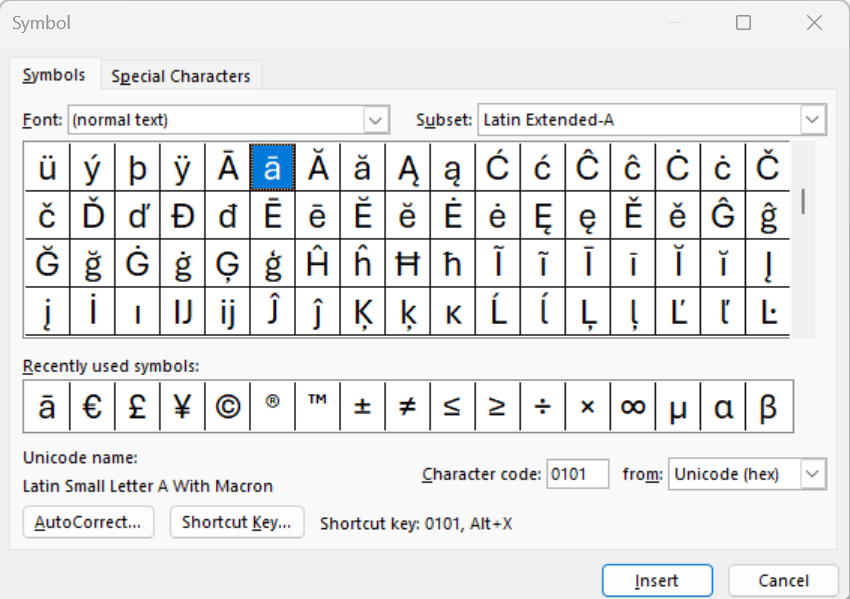
Add macrons to Māori text

  • Select Insert
  • Click Symbol in the Symbols box on the right
  • Search and select the relevant letter (Click More symbols if necessary)
  • Click Insert

Embedding a Link

To embed a link in your Word document:

  • Highlight the text or picture that you want to embed a link into
  • Select the Insert tab
  • Click  or right click the text / picture and click Link on the shortcut menu, or use the short cut key Ctrl K
  • In the Insert Hyperlink box, enter your link in the Address box

Adding pictures, shapes, charts and more

To insert a picture 

  • Select Insert > Pictures > This Device for a picture on your PC 
  • Select Insert > Pictures > Stock Images for images or backgrounds
  • Select Insert > PicturesOnline Pictures for a picture from the web

Select the picture you want, and then select Insert.

Resize or move pictures

  • To resize a picture, select the picture and drag a corner handle

  • To wrap text around a picture, select the picture, and then select a wrapping option
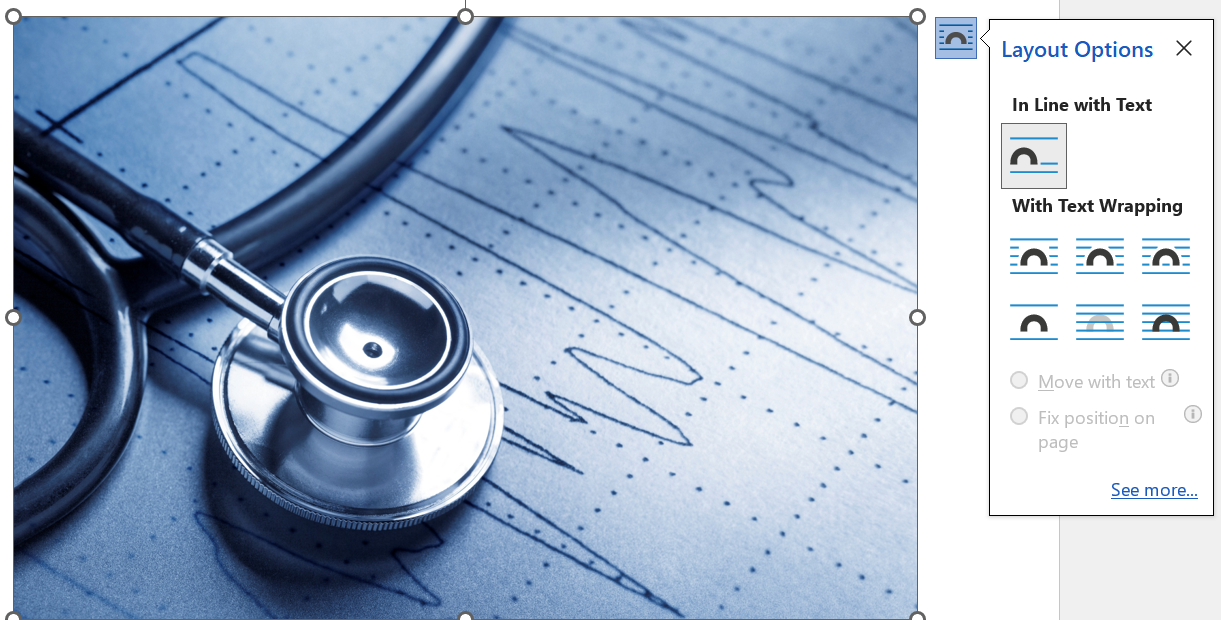
Saving your Word Document

Save to OneDrive

  • Click File in the top left
  • Select Save As
  • Click OneDrive Whitireia and WelTec

Save to your personal device

  • Click File in the top left
  • Select Save As
  • Double click This PC
  • Give it a file name, select a folder
  • Click Save

Collaborating or Commenting on a Word Document

  • When someone shares a Word document with you, the email you receive includes a link that opens the document in your web browser.
  • If anyone else is working on the document, you'll see their presence and the changes they're making.  This is real-time collaboration

Track and review changes

  • To track changes, select Review > Tracking > Track Changes.
  • To review changes, place the cursor before a change and select:
    • Accept to keep the change, or

    • Reject to remove it

Comments

You can give feedback by adding comments

  • Select what you want to comment on 
  • Select Review > New Comment
  • Type your comment
  • Post your comment by using Ctrl + Enter or click the blue plane icon 
  • Click elsewhere in the document when you are done.
 

Reply to or resolve a comment

  • Select a comment
  • Select Reply
  • Type your reply
  • Post 
  • To Resolve, click the ... and resolve thread
  • To delete click the delete icon

Show comments

  • Select Review > Show Comments to show or hide the comments.
  • Select Next or Previous to go between comments

Creating a Document in Word

  • Open Word
  • On the left, select New
  • To start from scratch, select Blank document
  • To use a template, double-click a template image or type the kind of document you want into the Search for online templates box and Click Enter

Removing the squiggles

Have you noticed coloured squiggly lines under some of your words? 

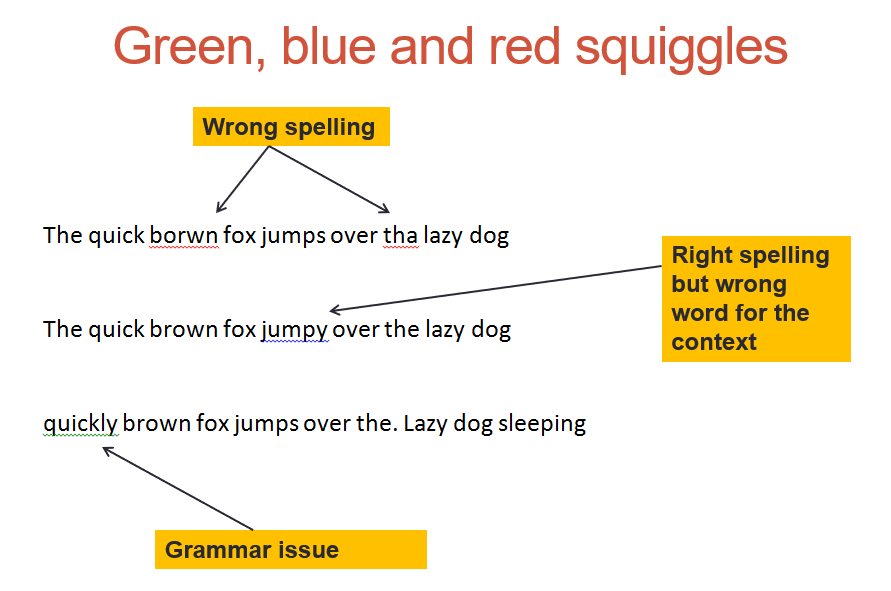
It is important to clear the squiggly lines before submitting your work, otherwise your tutors will see your errors straight away. To clear them, try one of the following:

  • Fix the spelling or grammar yourself
  • Right click on your mouse to choose from a selection of correct words - Make sure that you choose the right one
  • Right click on your mouse to ignore the error, if you believe it is correct
  • Right click to on your mouse and select 'Add to Dictionary'
    • Names and non-English words will appear as incorrect - like Te Reo Maori words
    • NZ spelling might also appear as incorrect

Word: Check Spelling and Grammar by LearnFree

Inserting a Table

  • Click Insert >Table and move the cursor over the boxes until you highlight the number of columns and rows you want

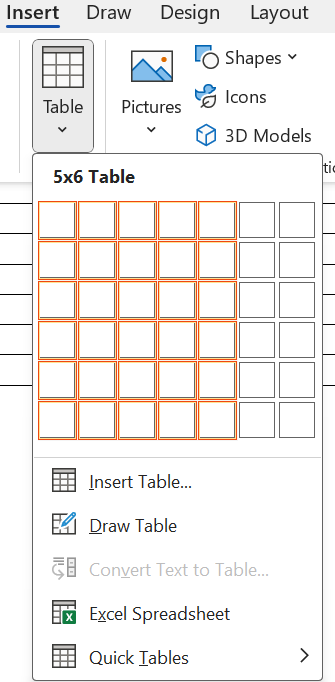
To customise a Table

  • Click the down arrow under Tables
  • Click Insert Table
  • Add numbers of columns and rows
  • Click OK
  • Click Draw Table to create your own table

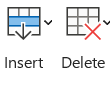
Insert or delete columns or rows

  • Put your cursor on the table, either click the icon or right click your mouse to see 
  • Select insert or delete to add or take away rows, columns or whole tables

Dictating your documents in Word

Microsoft 365 Word has a dictation feature. This allows you to use speech to text as long as you have a microphone and reliable internet connection.

  • Turn your microphone on and make sure it's working
  • In the Home tab, click the down arrow below Dictate, then dictate from the drop-down menu
  • Wait for the tool bar to appear
  • Start talking, including the name of any punctuation marks to add them. What you are saying will be written on your document
  • Saying delete removes the last word or punctuation before the cursor. Saying delete that removes the last spoken utterance
  • To bold, apply italics, underline or strike through a word or phrase, say a phrase, then say Bold and the word you want in bold. This will appear in your text e.g. "bold cultural safety" will appear as Cultural safety focuses on ...
  • By default, Dictation is set to your document language in Microsoft 365
  • Click dictate to exit

Sharing your Word Document

When you share your document with others and give them permission to edit, everyone's changes are made in the same document.
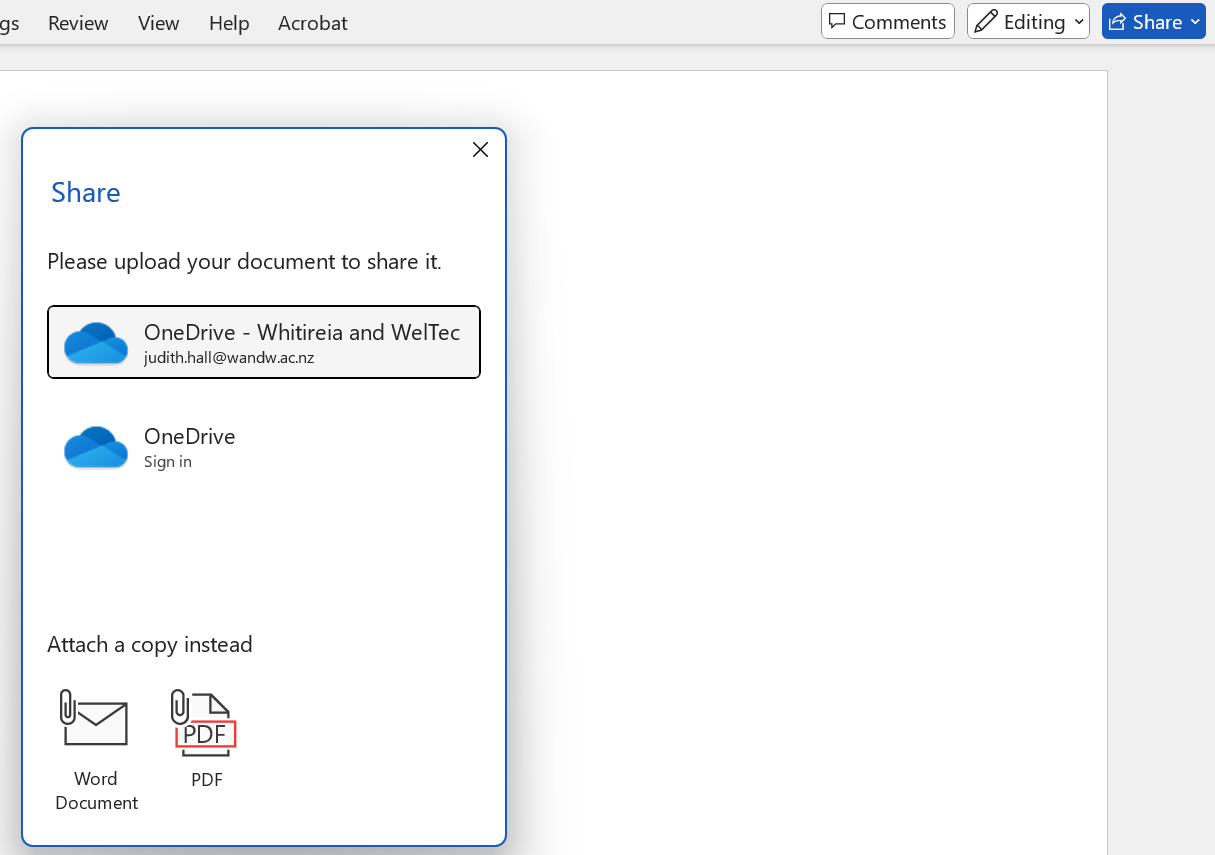
Share a document

  • In the top right corner, above the ribbon, select Share

  • Save your document in OneDrive, if it's not already there

  • Name your document 


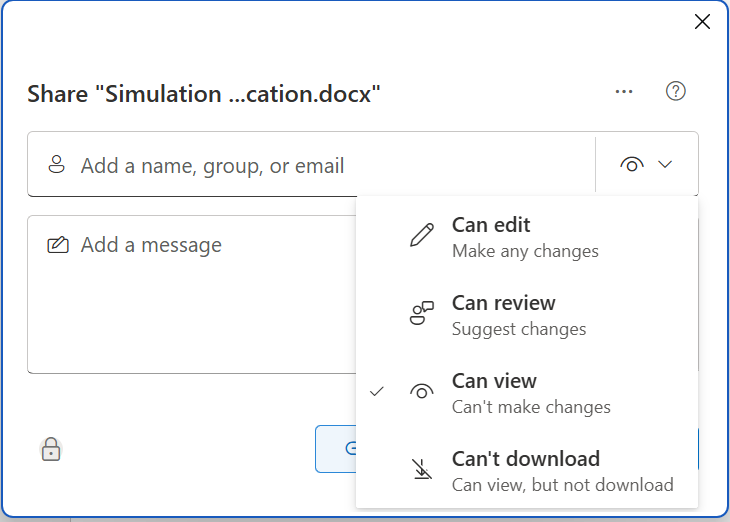
  • Give permission to the people you're sharing with (i.e. can edit, can review etc.)

  • Add the names of the people you're sharing the document with

  • Type a message, if you want, and select Send

    The people you're sharing with will get mail from you, with a link to your document


Referencing Feature in Word

  • Though Word has a referencing tool it follows the 6th edition.  APA is now on the 7th edition, so any references created by this citation generator need to be checked and updated
  • If you have used information that has come from someone else (an author's ideas, words, research findings or a figure such as an image, table, graph etc.), you need to acknowledge the author by referencing it
    • In-text citations. This is brief information in the text of your assignment, next to the quote or paraphrase. This is usually the author's surname (or group author name) and the year of publication
    • Reference list. The reference list is on a separate page at the end of your assignment. The list is arranged alphabetically.  You need to use double spacing and apply hanging indentation. You need to provide the full details for each cited source and only include sources cited in the text of your assignment

For more information, please refer to the APA Referencing guide. Also, check out the Formatting your reference list tab in this guide 

Library Services

If you have any questions regarding researching, accessing resources or referencing, don't hesitate to contact the library team! You can:

call 0800 141 121

email LibraryServices@wandw.ac.nz